HOW TO LAY A PATIO - AN OVERVIEW
If you’re embarking on a DIY patio project, there are a number of things to consider before getting started. From the planning of materials, groundwork and foundations, to laying the slabs, cutting, jointing and aftercare.
Here we take a look at how to lay a patio step-by-step, with considerations at each stage for best results, and guidance on laying porcelain and natural stone. Whether you’re using vitrified porcelain paving or natural stone, you’ll find information on:
- Things to consider
- Groundwork and foundations
- Laying the slabs
- Cutting
- After laying
For detailed installation guidance and instructions which you can print-off, download our Guide to Installing Vitripiazza or Guide to Installing Natural Paving PDFs.
THINGS TO CONSIDER WHEN LAYING A PATIO
Before starting your patio project, there are a few things you need to consider. First of all, work out the dimensions of your area, and use dimensions that minimise cuts - pegging out the area to help you picture it. Then calculate the paving you need in m2 (metre squared) and add 10% to allow for cuts, wastage, and any accidental damages. Our porcelain product pages offer a handy tool to help you calculate the required products for your project.
Remember, groundwork and installation are heavy work. Ensure you have the appropriate PPE and tools for the job. As with any DIY project, it’s always worth researching other sources and techniques - if in doubt, ask an expert for advice. This guide features our suggested methods, but there are many others out there. Where there is specific product guidance, this is borne from our experience with our products.
PLANNING AHEAD
There are a number of things to consider when embarking on a DIY patio project, from placement to foot traffic and surrounding elements. An important consideration is the type of use and traffic your area will be exposed to - make sure you plan adequate foundations to give many years of service.
For new or extended areas at the front of the property, consider planning permission requirements around water management and providing appropriate drainage to avoid runoff onto the public highway. For all patio projects, you’ll also need to consider where your services are, for example, drains, underground and overhead cables.
Finally, there’s storage - consider where you can store and stack the product during installation and where you will have your mixer and aggregate. Don’t forget to organise a skip!
GROUNDWORK AND FOUNDATIONS
DIGGING OUT THE SUB-BASE
Firstly, dig out to allow for sub-base depth, plus laying bed depth, plus paving depth. For a garden patio, usually a compacted 100mm - 150mm sub-base is adequate. For example, if you were installing a 20mm thick paver on a patio with a 100mm sub-base and 30mm mortar bed, you’d need to dig down approximately 150mm.
Remember to account for the required gradient too when digging out, and consider the type of ground you’re working with. Saturated ground may need to be allowed to dry out, and certain conditions may require a geotexitle membrane to stop migration of the sub-base into the sub-grade.
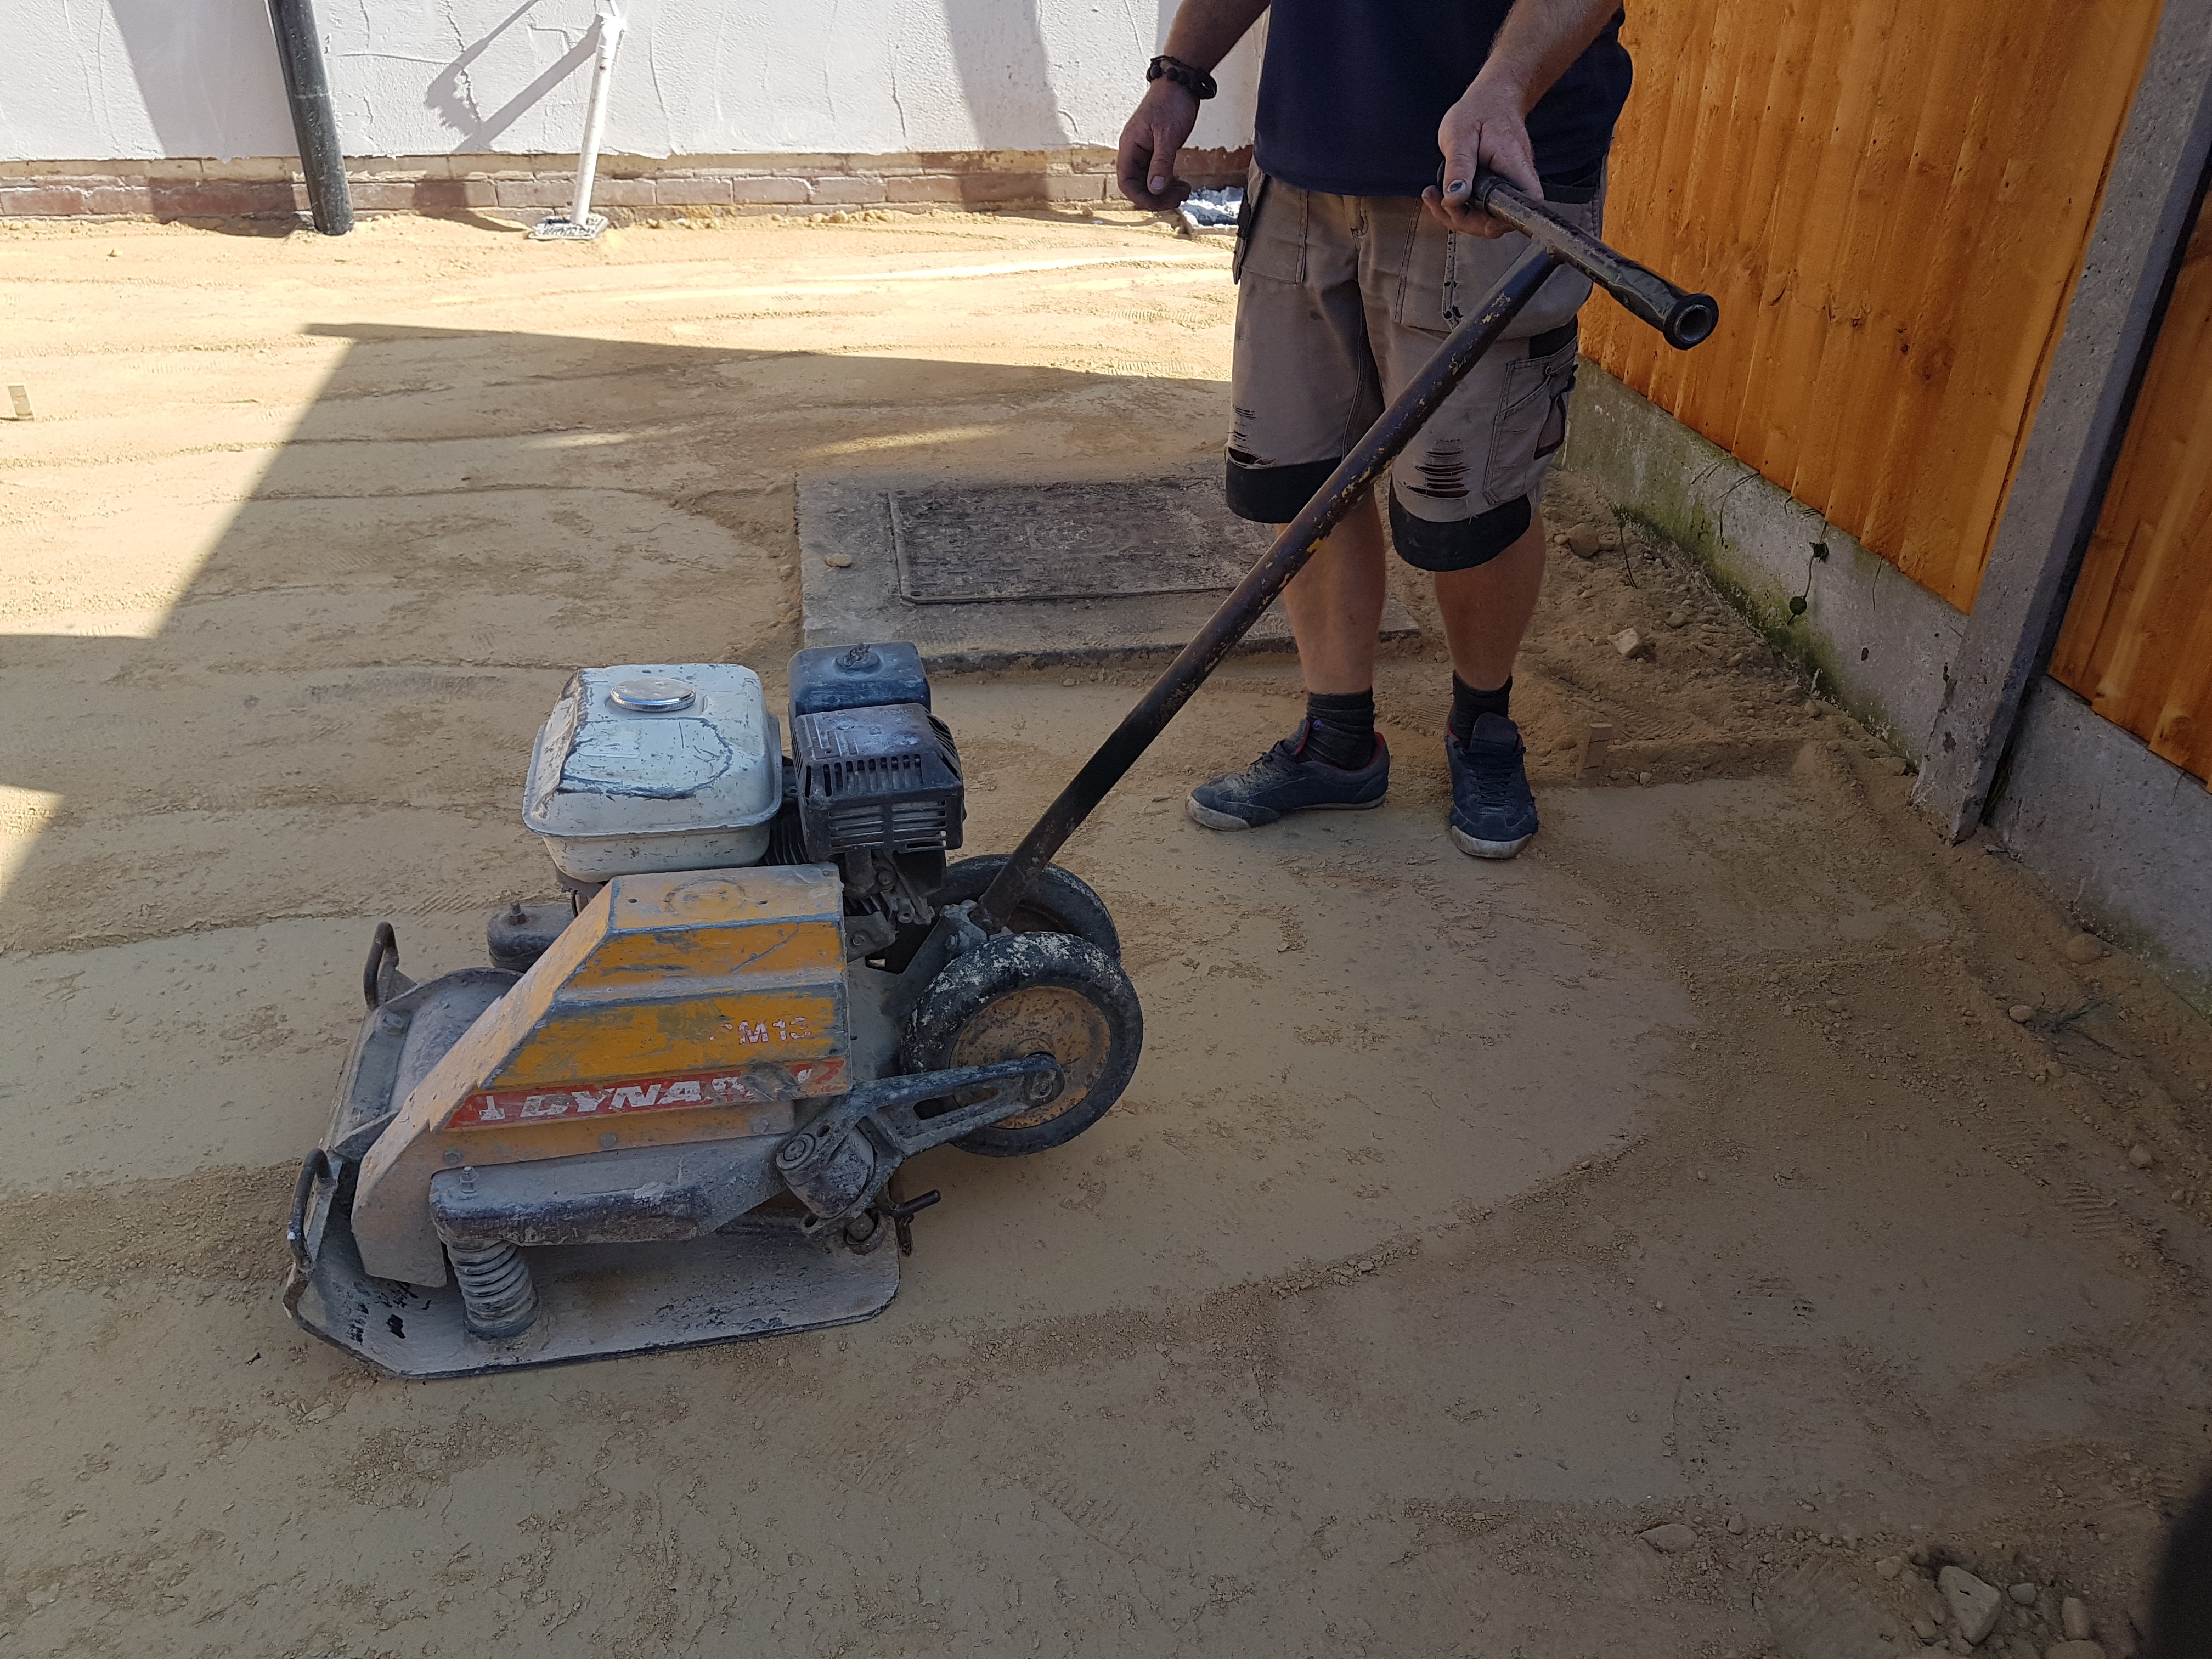
INFILLING YOUR SUB-BASE AND COMPACTING
Next, infill your sub-base. MOT Type 1 (DTp 1) is generally appropriate for most domestic installations. On rare occasions, some ground conditions may require a Hydraulically Bound Material (HBM) instead to create a fully bound/rigid construction. HBMs are specially sourced aggregates mixed with a binder that then hardens.
Rake out your MOT Type 1 evenly, making sure to damp it down before compacting. The easiest and most effective way is to use a Vibrating Plate Compactor. Fully compact in layers of approximately 75mm until the desired depth is reached, including your required gradients.
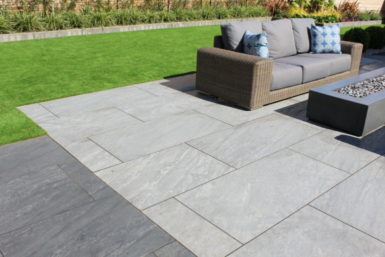
LAYING YOUR PATIO
Contrary to popular belief, porcelain paving can be laid using the exact same methods as natural stone. The only difference to note is that porcelain requires a priming slurry to be applied to the back of each tile before laying, which creates a stronger adhesion to the mortar bed.
BEFORE YOU START
Before you start, there are a few things to consider. First of all, check your product to ensure it’s up to your expectations. Never lay products that aren’t up to standard, and report them to your merchant straight away.
Porcelain is a batch matched product so check each pallet is from the same production batch and shade reference, see our Understanding Vitripiazza Batching Guide to help you identify the batch numbers for your product. Do not start the project without confirming all the batch numbers are the same. It’s not a bad idea to keep a note or take a photograph of the batch code, in case, you ever need it again.
Consider dry laying your paving as a trial run - this is a great way of seeing the blend of products and confirming your laying pattern to your taste. Mixing from several crates at a time also helps achieve a natural blend for natural stone materials.
You’ll also want to protect edges when stacking them pre-laying, and always make sure to never lay in temperatures of 5 degrees and below. Make sure to set out string lines, checking lines and levels regularly as you lay your patio.
MIXING YOUR MORTAR
Next, make up a slightly wet mortar mix - five or six-parts building sand to one-part cement is usually adequate for patios. A good guide is that there should be sufficient water to allow the mix to be moulded into a ball without falling apart, but not so much that water would run out of it if it were to be squeezed in your hand.
If the mix is too wet it won’t be able to support the weight of the flagstone, and if it’s too dry it won’t bond to the back of the stone, and can’t be tapped down to the desired level. For porcelain tiles, you may want to consider adding a plasticiser to the mortar mix to increase the workability and reduce water demand.
Other types of stone may also benefit from stronger mortar - consider the type of stone used and your pointing method. Where polymeric jointing compounds are going to be used, you may need drainage holes to allow water to drain through to the sub-base during early curing.
APPLYING THE MORTAR MIX
When applying the mortar mix, always prepare a full bed so it tamps down to approximately 30mm - it must support the entire slab. Never spot bed or ring bed, and if laying porcelain, always apply slurry primer to the back of the tile immediately prior to laying to aid adhesion to the bed. Other types of stone may also benefit from slurry primer, so make sure to check the manufacturer’s guidelines.
APPLY YOUR PRIMING SLURRY
Always apply a slurry primer to the back of the slab, immediately prior to laying, to aid adhesion to the mortar bed. Priming slurry is necessary when installing porcelain tiles, as it creates a strong bond between the porcelain tile and mortar bed. It is also recommended with natural stone slab installations for a strong bond, but is not necessary. We recommend the Pavetuf Priming Slurry, which is designed for exactly for this.
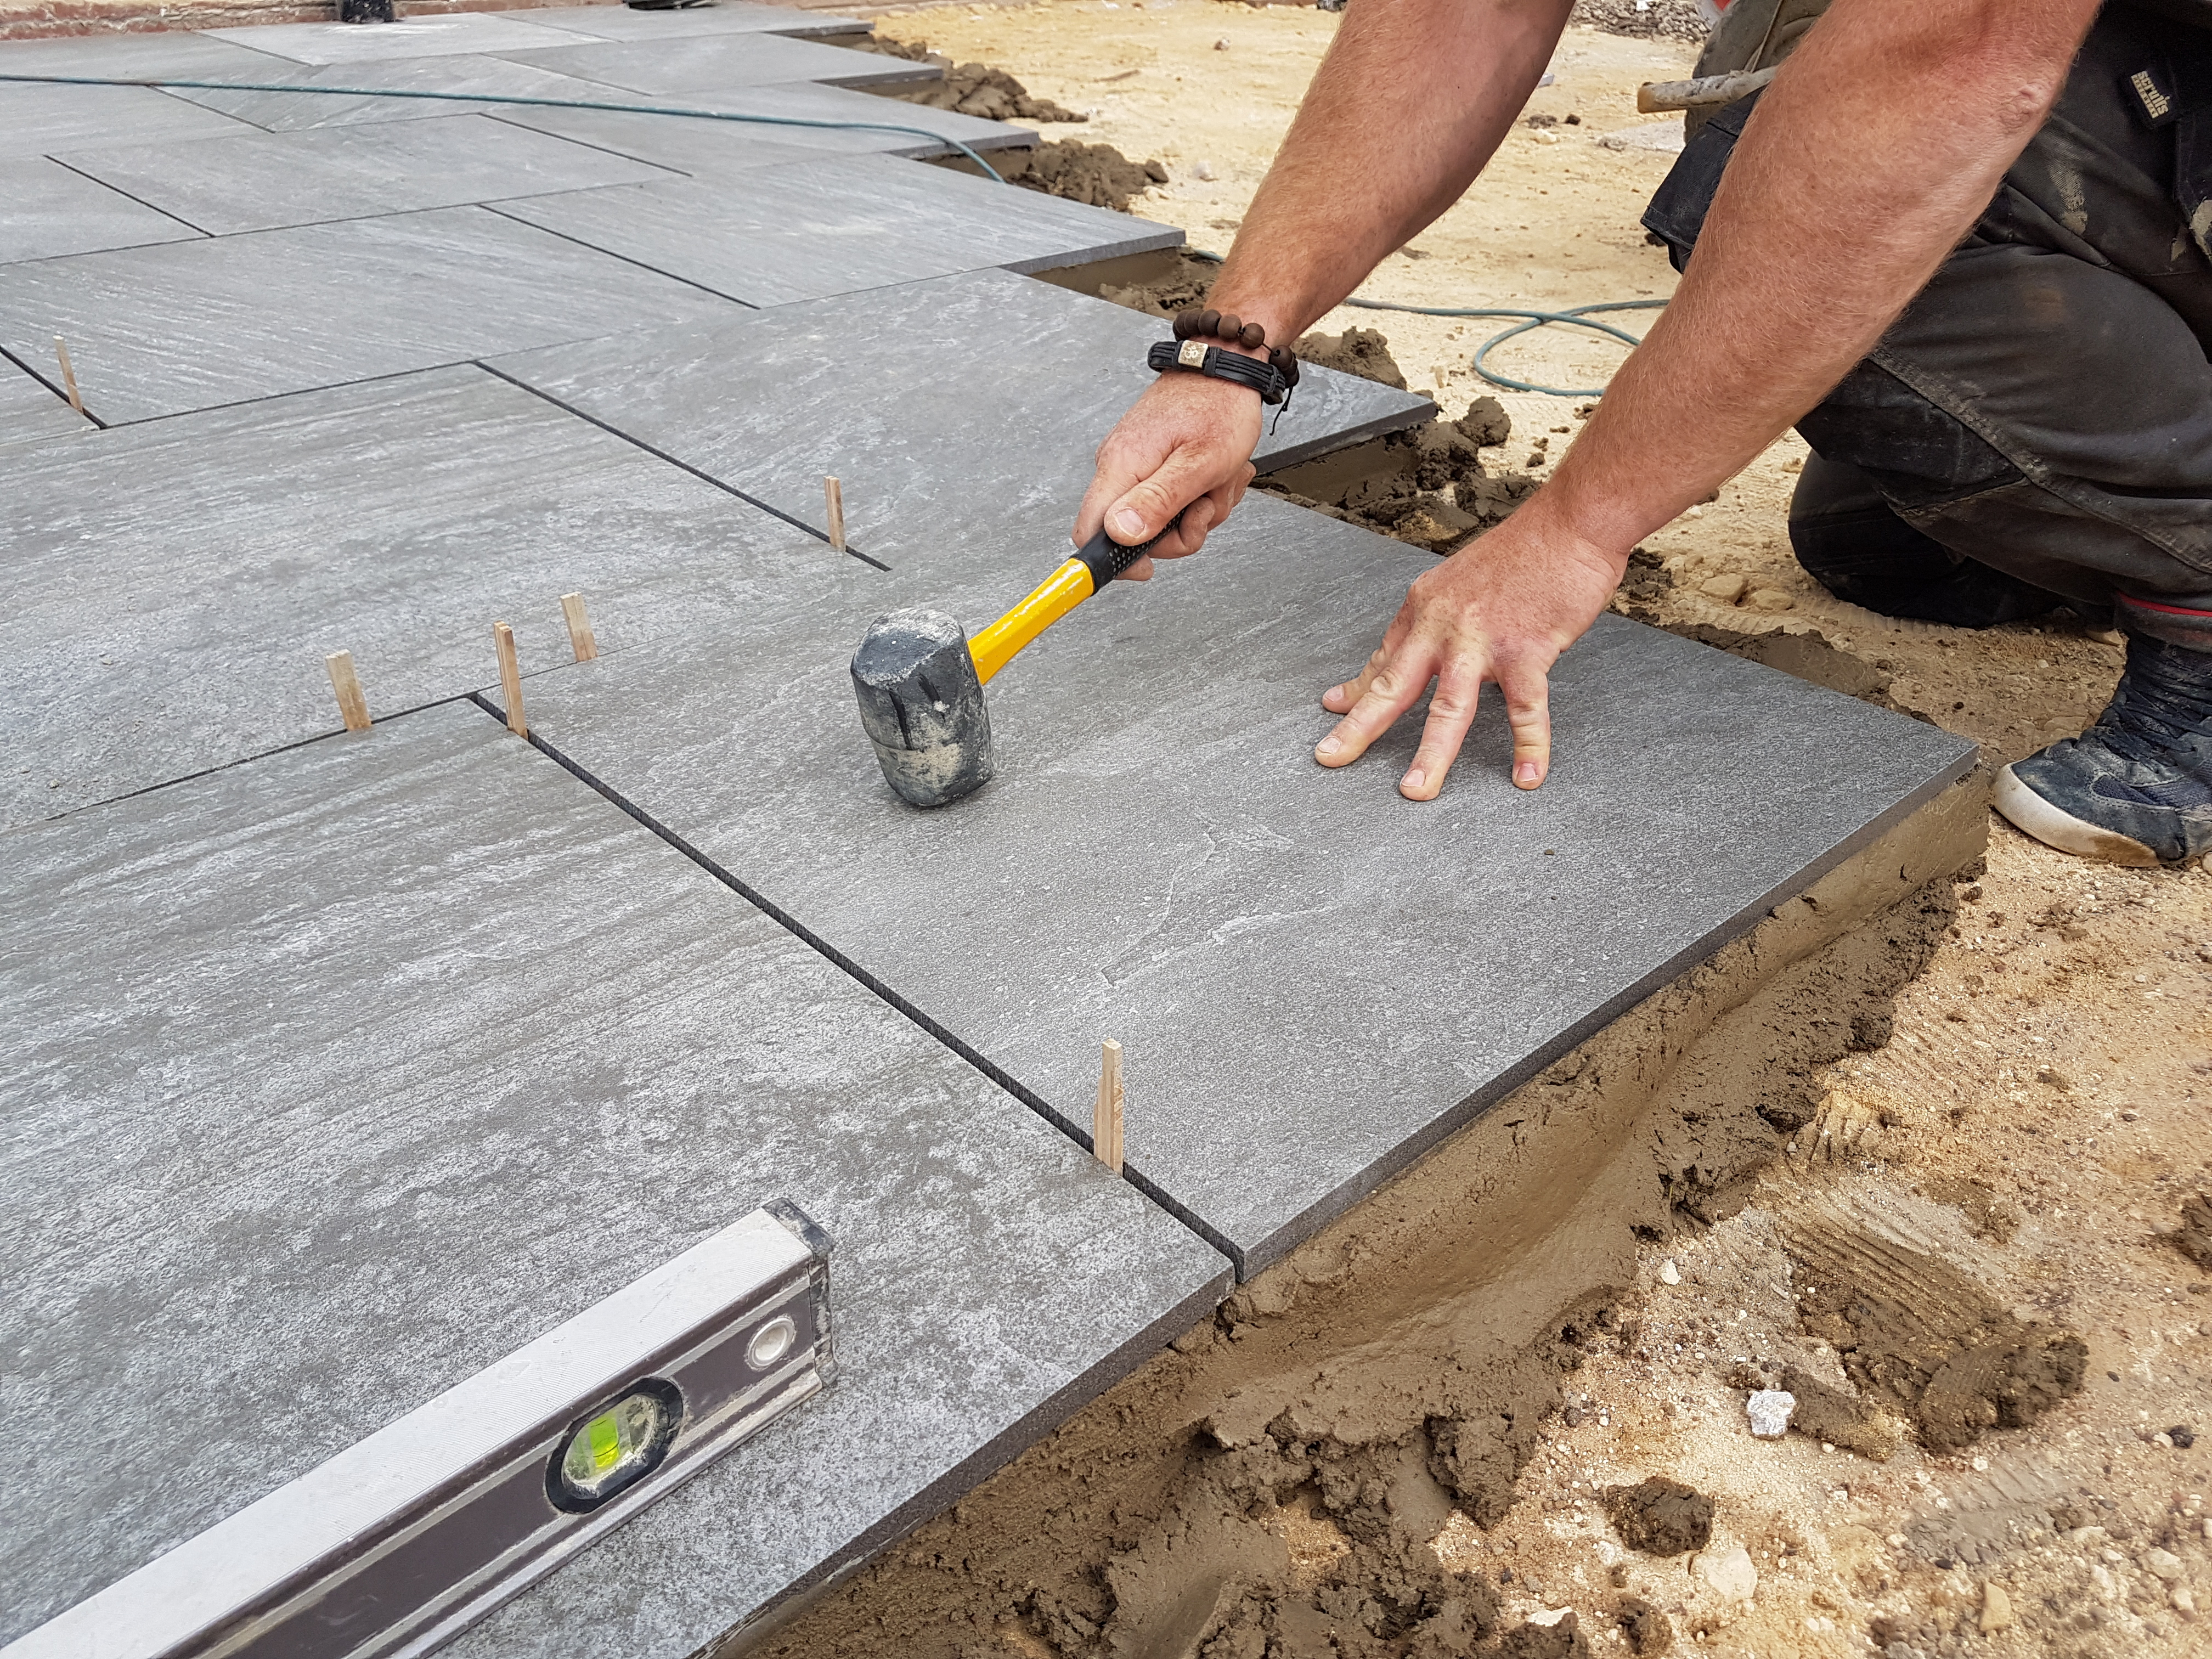
LAYING YOUR TILES
Once you’re ready to lay, place the slab and tap down using a rubber mallet or vibration hammer, checking the level to your string lines or using a spirit level. Repeat the steps with each individual slab to your chosen laying pattern, maintaining your joint widths.
Finally, never butt joints! Joints should be a minimum of 3mm or 6mm, depending on whether your slabs are rectified or unrectified.
If you’re laying porcelain, consider potential print repeats - for best results, try not to lay matching prints side by side or in the same orientation.
CUTTING YOUR FLAGS
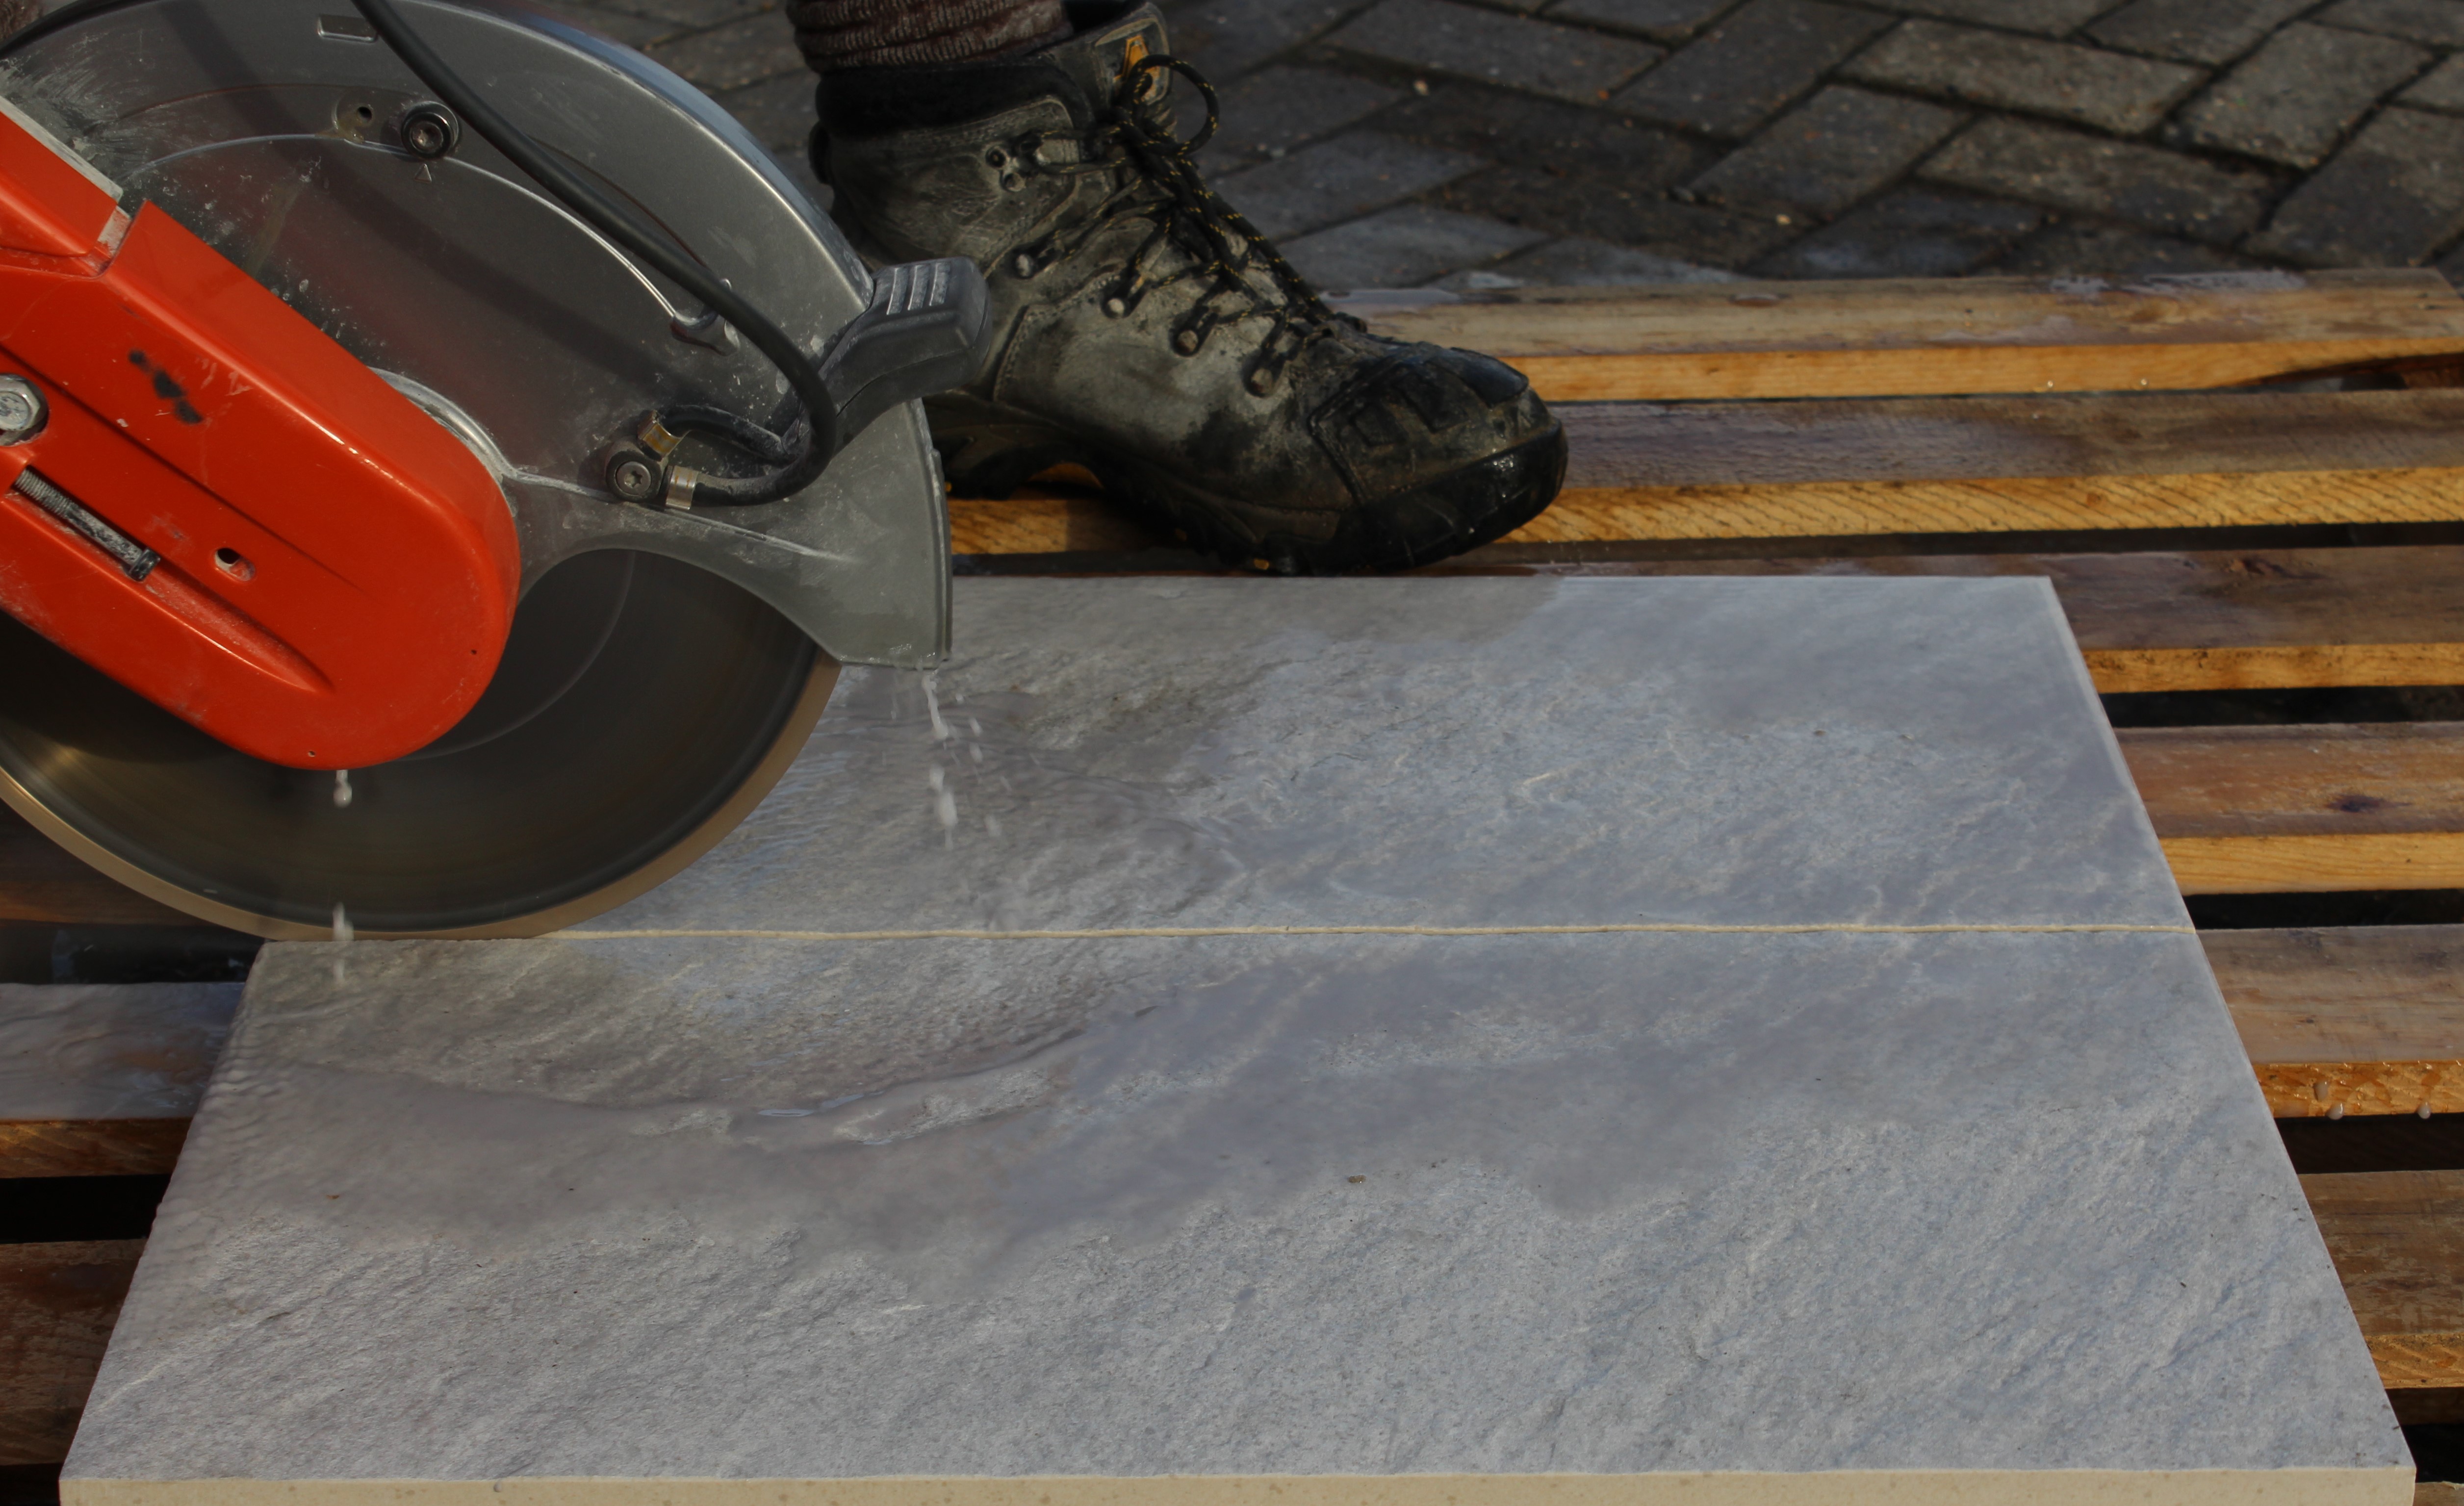
When cutting natural stone or porcelain tiles, it’s best to use a diamond-tipped blade with an appropriately powered disc cutter. Those with a water feed are ideal in order to suppress dust and lengthen the blade life, but not essential for most natural stones.
Be aware, cutting vitrified porcelain is trickier than all other paving types - even for the experienced. Blades will also dull quicker than when cutting other paving types. Blunt blades will affect the quality of the cut, so you may want to consider running through a softer product like breeze block or Concrete Block Paving between cuts to help maintain it.
You’ll also want to keep vibration to a minimum whilst cutting porcelain, so you may wish to cut on a bed of sand. For intricate work, try to use the smallest cutting wheel you have available to further cut down on vibrations.
EXPERT TIP FOR CUTTING PORCELAIN
‘Colour-bodied’ porcelain doesn’t cut as neatly as the ‘full-bodied’ porcelain. For best results, try using a 4” angle grinder or a 7” or 9” bench cutter, particularly for lots of cuts or intricate work. The smaller wheel cuts down on vibration and should achieve a neater finish.
AFTER LAYING YOUR PAVING
Once you’ve completed laying your patio, do not walk on the paving for at least 24 hours. Then, make sure to point as soon as possible, once you can walk on the paving.
JOINTING / POINTING YOUR PATIO
For rectified ranges of paving, you can lay with joints upwards of 3mm. For unrectified porcelain ranges, we recommend you lay with joints upwards of 6mm.
Our Pavetuf Jointing Grout has been designed specifically for porcelain paving, and is appropriate for traffic up to domestic cars and small van weights, suitable for joint widths of 3mm-15mm.
WHAT’S NEXT?
We hope this guide has provided you with enough information to start your DIY patio project. If you’re working with vitrified porcelain, download our in-depth step-by-step PDF guide on laying Vitripiazza paving here. We also provide a full step-by-step guide on laying natural stone, which can be downloaded here.
If you need any further guidance, or are looking to consult with a specialist regarding your patio project, our expert team can advise you of installers in your region who are familiar with our products.